HamSwitch
Prototype
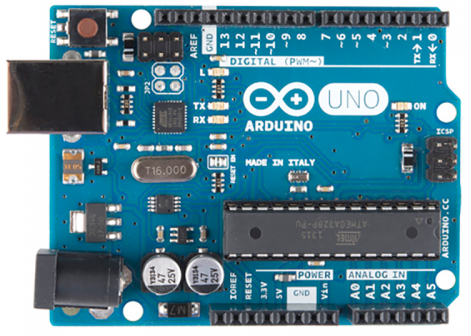
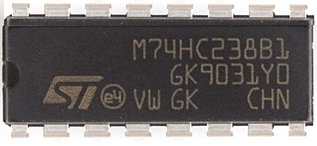
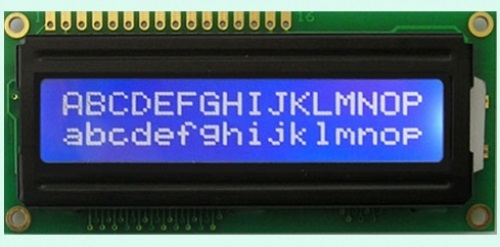
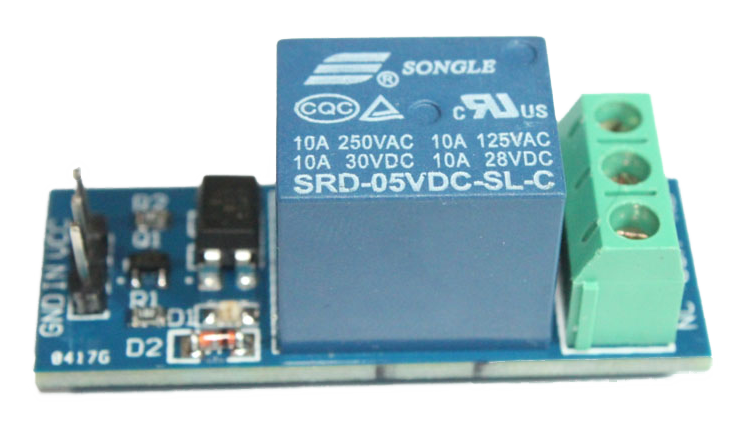
Hardware
| Arduino 'Uno' |
74HC238 - 3 to 8 Decoder |
Rotary Encoder |
LCD | DC Relay (Array of 8) |
 |
 |
 |
 |
 |
| Resistors | Diodes | 2n2222 Transistors |
Max232 | |
 |
 |
 |
Application
HamSwitch allows the user to toggle between 2 antenna selection modes:
- Automatic (Radio Priority Mode)
- Manual (Manual Only Mode)
In “Radio Priority Mode”, the 3 to 8 decoder selects the relay (antenna)
based on the frequency input from the radio, while maintaining the user manual selection capability.
if the user turns the rotary encoder, HamSwitch will change back to “Manual only” mode.
In “Manual Only Mode”, the radio input is ignored (The controller does not send CAT requests) and the 3 to 8 decoder
selects the relay (antenna) based on the user input from the rotary encoder.
Emergency Button
Clicking the rotary encoder button changes to “Manual Only Mode” and selects the dummy load.
State Persistence
Every change in the selected antenna and in the selection mode is saved to the eeprom and loaded when HamSwitch is turned on. This way the user gets his HamSwitch just as it was left..
Schematics
Here is the main Schema:

Here is the Realy Schema:

Usage
All you have to do is to set the radio flag and to populate your list of antennas
Selecting the radio
Just open UserSettings.h and set MY_RADIO to the right value (HamSwitch needs to know which radio you use so it can send the correct commands and correctly parse the response)
/*
  ICOM 0
  YAESU 1
  KENWOOD 2
  ELECRAFT 3
*/
const int MY_RADIO = 2;
You may set the flag AUTO_DETECT_INTERFACE to true and let HamSwitch figure out which interface to use.
const bool AUTO_DETECT_INTERFACE = true;
Setting the antenna list
Antenna has 3 parameters:
Port - The Socket number it is connected to. Since HamSwitch supports 8 sockets, this number is in the range of 0-7.
Bands - The list of bands it supports.
Description - a friendly name e.g. ‘Dipole 40’.
If you open MyAntennaList.h you’ll find a declaration of an array called AntennaList.
This is an array of Antenna type objects.
Antenna* AntennaList[NUM_OF_ANTANNAS];
You will also find a method called InitAntennaList() and this is the place to define your antennas.
The method is devided to 8 sections - one for each antenna.
The Port is simply the index of the antenna in AntennaList array.
Port 0 is always the Dummy Load - Do not change that!
In order to define the band list, just create a SimpleList object.
Use push_back(int) to add the band to the list.
Here is an example of how to define a 3 bands (20,15,10) KLM kt-34xa antenna on port 1:
SimpleList<int> ant1_BandList;
ant1_BandList.push_back(20);
ant1_BandList.push_back(15);
ant1_BandList.push_back(10);
AntennaList[1] = new Antenna("1", ant1_BandList, "KLM34xa");
License
FREE for non commercial use by Amateur Radio Operators
Download
Authors
Requirements and Analysis: Dubi, 4Z5DZ
Design and Code: Gil, 4Z1KD
Latest Version: September 2020